Flashing my first LED in 1 minute


|
|
|
|
Flashing my first LED in 1 minute
|
This section will lead you to run your very first project. The objective of this project is to blink a led using a very simple project called LedBlink.
Follow the indicated steps
| • | Launch the LadderDIP PLC Studio software |
| • | Open the LedBlink project "..\projects\samples\ladderdip4\ledblink\ledblink.lww", the following diagram should appear |
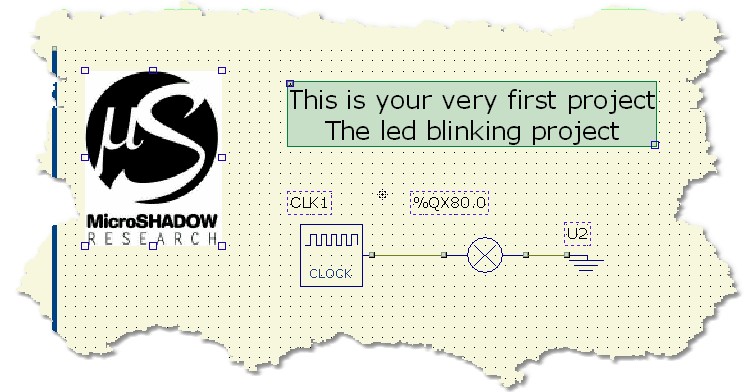
The project uses three only components. The first component, the CLOCK, generates a square wave pulse stream. The second component, attached to the CLOCK output, is a electrical generic output block (EOUTPUT). The output block is associated with the address %QX80.0 that means the first output OUT1 of LadderDIP
To make this project running you need to connect a simply LED on the pin IO1 of your LadderDIP. The LED also need a resistor for current limiting
Please refer to the image below
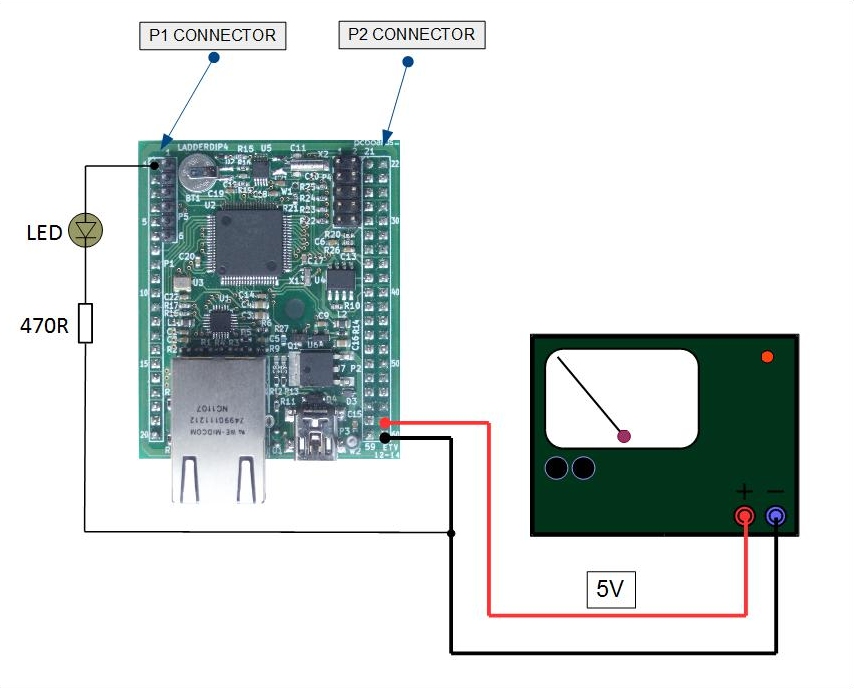
The project is already configured to use the IO1 pin of LadderDIP module as an OUTPUT.
| • | Check your Ethernet port configuration accessing, from the menu, the Options |
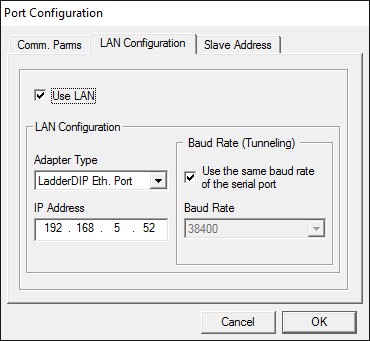
Please carefully check the following parameters:
| • | The "Use Lan" Check must be set |
| • | The "Adapter Type" must be set to "LadderDIP Eth. Port" |
| • | The "IP Address" must be the one set for the module |
|
IMPORTANT NOTE
LadderDIP PLC Studio uses the Ethernet port of your PC. You could have Firewalls or Anti-Viruse softwares that block any access to this resource
Please properly configure, if you have installed in your PC, any Firewall or protection that locks the access to the Ethernet Port
|
TESTING THE CONNECTION OF LadderDIP PLC Studio with LadderDIP IV
Read the following paragraph to check the connection: Checking connection
At this point, using the LadderDIP PLC Studio software, you can check if the connection is OK simply pressing the connect button ![]()
| • | Once everything is ready you can press the Build All button |
module. The executed processes will be: Compile, connect, erase, download and run. These processes will be accomplished by dialogs and progression bar to check the current status of operations
If everything is ok you will see the project running. You can see your LED blinking ... enjoy it