And now, blink the first led in 1 minute


|
|
|
|
And now, blink the first led in 1 minute
|
This section will lead you to run your very first project. The objective of this project is to blink a led using a very simple project called Blink.
The Blink project is almost present in all LadderDIP PLC Studio distribution and it is normally present under the samples directory.
Open the Blink project "..\projects\samples\ladderdip4\ledblink\ledblink.lww", a diagram similar like this should appear
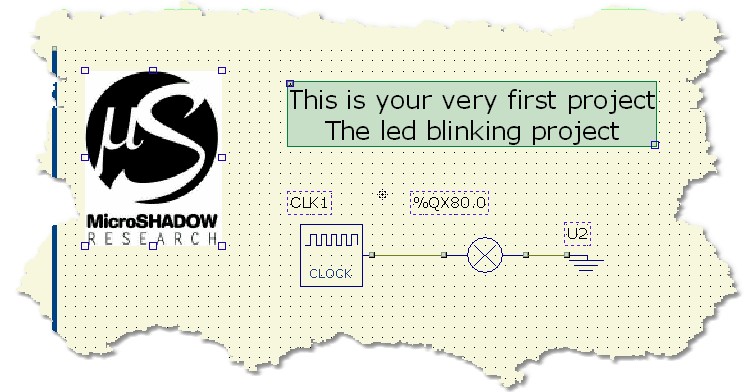
The project uses three only components. The first component, the CLOCK, generates a square wave pulse stream. The second component, attached to the CLOCK output, is a electrical generic output block (EOUTPUT). The output block is associated with an IEC address (%...) or a tag-name
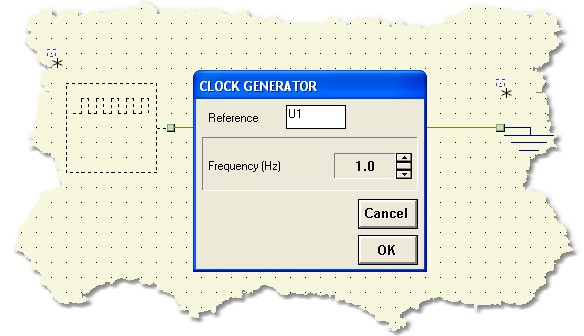
The frequency of the CLOCK component can be up to 10Hz (The dot point is the fraction of Hertz). If you enter, for example, 1.0 you will get a one hertz square wave to the output. This signal is then injected to the output block which will drive the preferred PLC physical output.
Once everything is ready you can press the Build All button ![]() (Also indicated as Build & Upload & Run in the build menu command), this will execute all the necessary operations to download and run a program into the PLC. The executed processes will be: Compile, connect, erase, download and run. These processes will be accomplished by dialogs and progression bar to check the current status of operations
(Also indicated as Build & Upload & Run in the build menu command), this will execute all the necessary operations to download and run a program into the PLC. The executed processes will be: Compile, connect, erase, download and run. These processes will be accomplished by dialogs and progression bar to check the current status of operations
If everything is ok you will see the project running. You can see the configured OUTPUT blinking, and, if the OUTPUT is physically attached to a RELAY will will also hear the device tick ... enjoy it
Click here for more information about the CLOCK block