Connetting components


Connetting components |


|

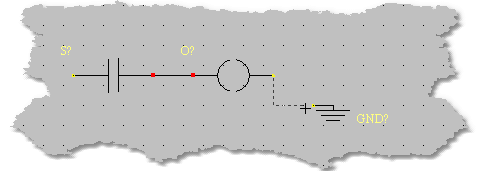
Once the components are placed in the schematic you have to connect the device's pins with wires. To draw a wire first select the wire tool from the tools bar . With the mouse click on a object pin and keep the left button on the mouse pressed, drag the wire to the destination position. When the destination pin is reached the wire will be effectively placed realing the mouse button. Wires extremes are snapped by a fixed grid and errors in placement are impossible. Remember that wires are always orthogonals so you have to split your wire in more parts if the destination pin is obstacled by other objects in the schematic. The effective good connection between components can be checked by looking at the wires extremity. If the wire terminal is marked with a coloured box then the connection is right. Wrong connections are indicated by a cross .
Wires can also be connected to the power bars. Connecting a wire to the left power bar will give a logical one to the net ( VCC ), connecting a wire to the right power bar gives a logical zero to the net (GND) . Sometimes it is more practical to use GND devices instead of the right power bar .
Wires can be moved using the same procedures used for components. Also the wires length can be modified performing the following procedure. Select with the mouse a wire extremity, a double arrow symbol will indicate the resizing, and keeping the left button on the mouse pressed move the extremity in the desired point. Wire length will be modified by releasing the mouse button. It can happen that a wire terminal is connected to other wires. To select a particular wire in a node click once the mouse button on the node until the desired wire is selected then procede with the resizing.